Launch your dropshipping journey today – Your first sale is closer than you think!
Ship To The Moon’s Public Catalogue gives you instant access to thousands of ready-to-sell products. Here’s how to add them to your store in minutes:
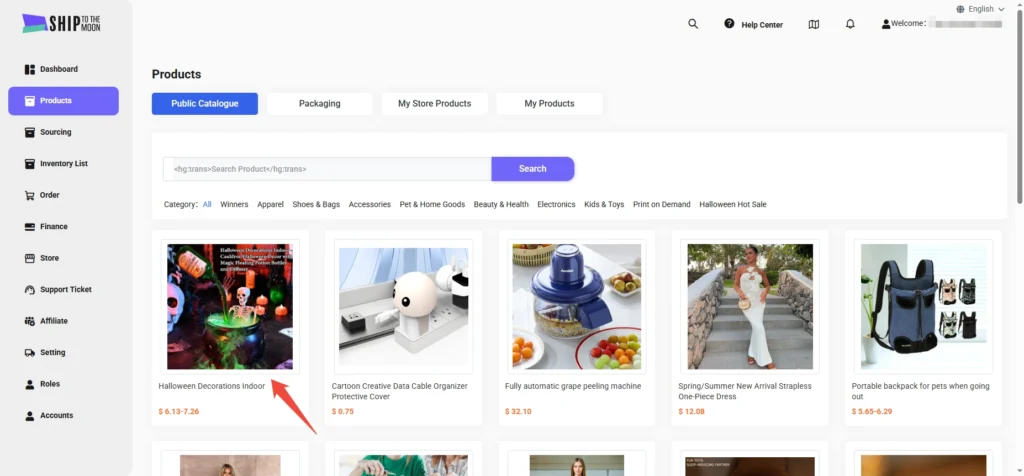
Step 1: Browse the Public Catalogue
- Log in to your STTM dashboard.
- Click Products → select Public Catalogue (top tab).
- Use category filter or the search bar to find products (e.g., “Halloween decorations”).
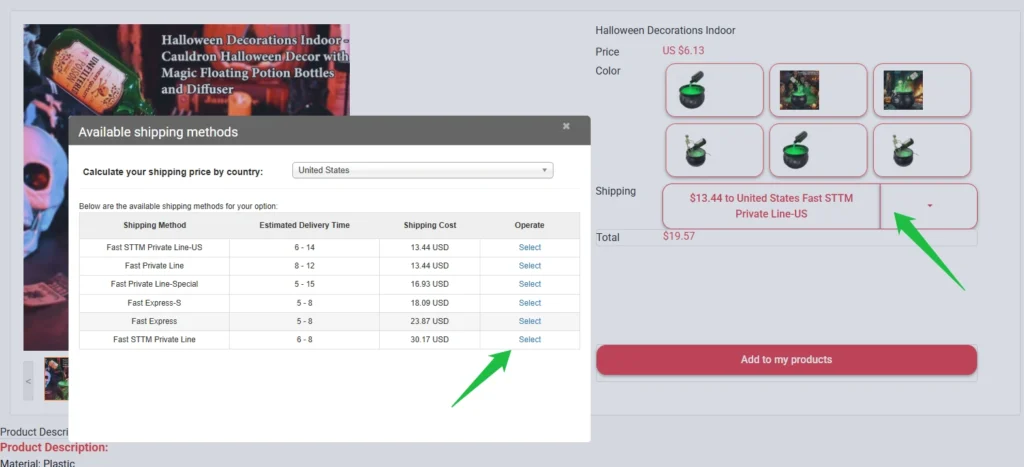
Step 2: Select a Product & Customize Shipping
- Click on a product (e.g., “Halloween Decorations Indoor”) to view details:
- Price, variants (colors/sizes), and product descriptions.
- Choose a shipping method:
- Click the dropdown under “Shipping” (e.g., “$13.44 to United States Fast STTM Private Line-US”).
- A pop-up will show delivery times and costs for different regions. Select the option that matches your target market (e.g., United States, Canada).
Step 3: Add to “My Products”
Once you’ve selected the product and shipping method:
- Click the red “Add to my products” button.
- The product will now appear in the My Products tab (under Products).
Step 4: Publish to Your Store
- Go to Products → My Products.
- Find the product you added (e.g., “Halloween Decorations Indoor”).
- Click the green “Publish” button next to the product.
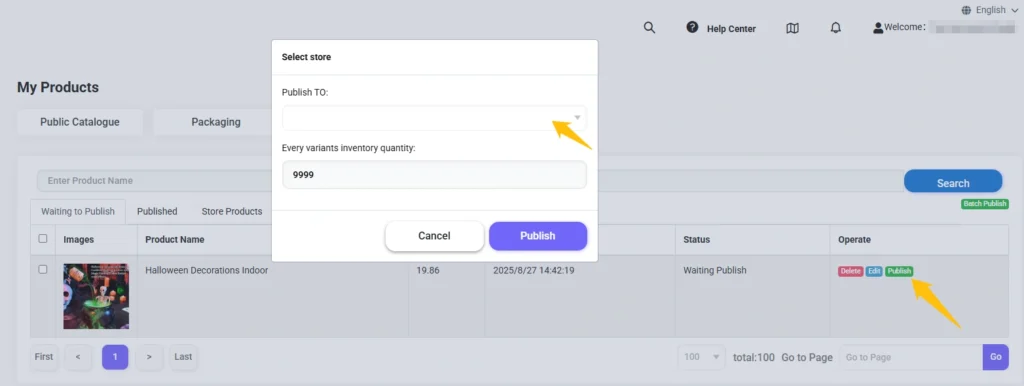
Step 5: Configure Store & Inventory
In the pop-up window:
- Publish TO: Select your connected store from the dropdown (e.g., Shopify, WooCommerce, Etsy—learn how to connect stores here →).
- Every variants inventory quantity: Set the stock level (default is 9999; adjust as needed).
- Click Publish.
Step 6: Verify in Your Store
After publishing:
- Check your store’s product list (e.g., Shopify admin) to confirm the product is live.
- STTM will sync inventory levels—when orders come in, we’ll fulfill them automatically.
FAQs
1. Can I edit the product description or images before publishing?
Yes! After adding to My Products, click “Edit” to customize details like titles, descriptions, or images.
2. What if I need to change the inventory quantity later?
Update stock levels in STTM’s My Products tab—changes sync to your store automatically.
3. Which store platforms does STTM support for publishing?
Shopify, WooCommerce, Etsy, and custom platforms via API. Learn more about integrations →.
(Need help connecting your store? Check our store integration guides →)